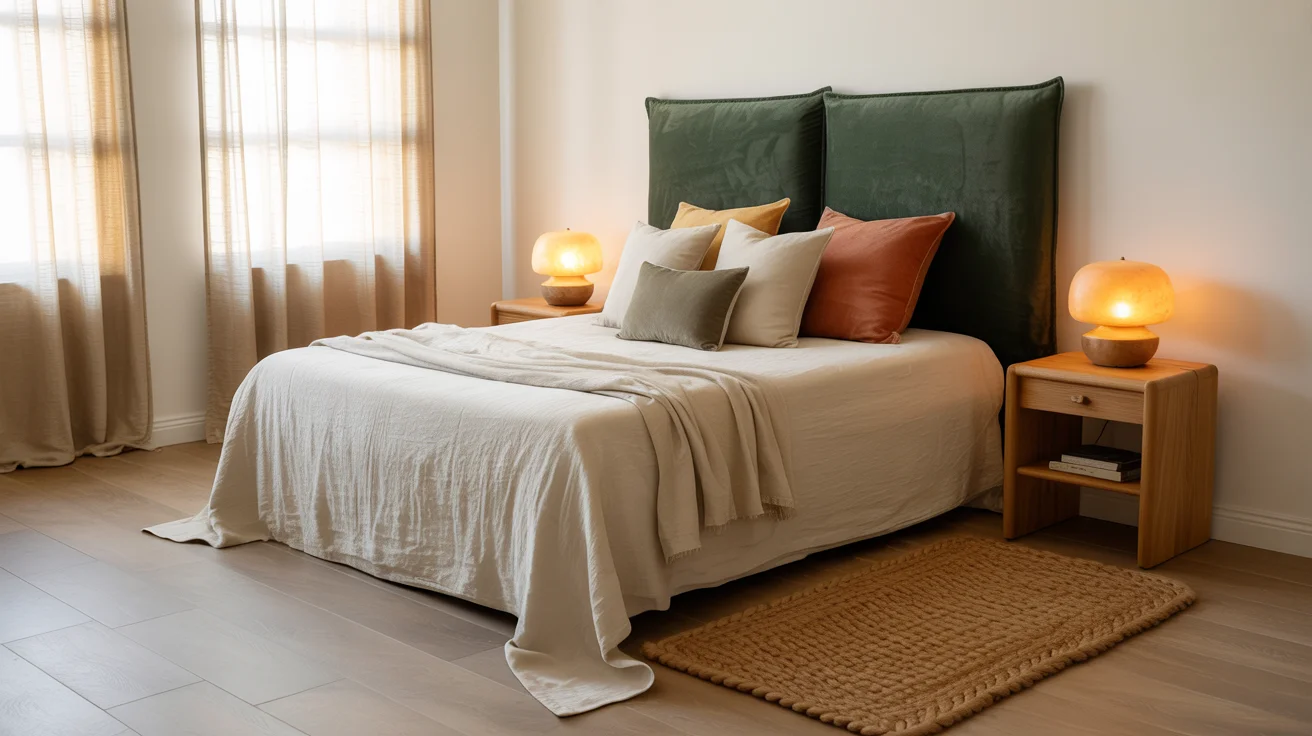
1. An Upholstered Headboard Made from Plywood and Foam
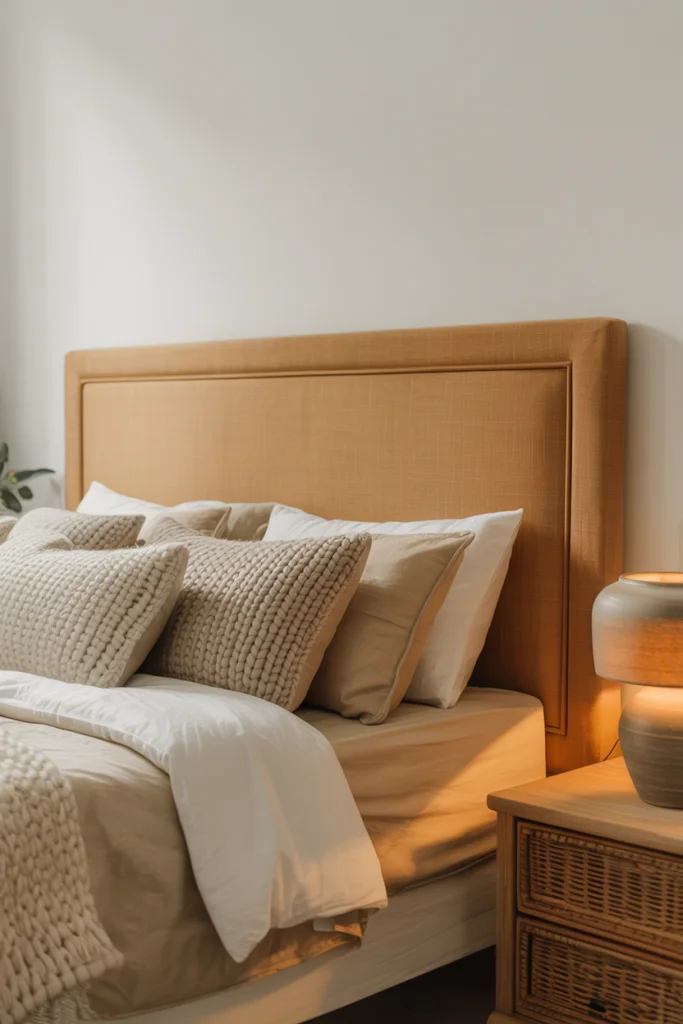
An upholstered headboard adds instant high-end luxury and ergonomic comfort to any bedroom, turning a bare wall into a plush retreat for reading or relaxing. To build this classic design, you will need a 1/2-inch plywood sheet cut to your bed width, 2-inch high-density upholstery foam, polyester batting, heavy-duty spray adhesive, durable upholstery fabric (such as linen, velvet, or boucle), and a heavy-duty staple gun with 3/8-inch staples.
Begin by adhering the foam to the plywood base with spray adhesive. Wrap the batting and fabric over the foam, pulling firmly from the center toward the corners while stapling securely along the backside. Mount the finished panel directly to wall studs using heavy-duty French cleats for rock-solid stability.
**Skill Level:** Beginner to Intermediate | **Time Investment:** 2–3 hours | **Estimated Cost:** $45–$80. This budget-friendly project mimics luxury showroom headboards that typically retail for upwards of $600.
2. A Reclaimed Wood Plank Headboard for Rustic Texture
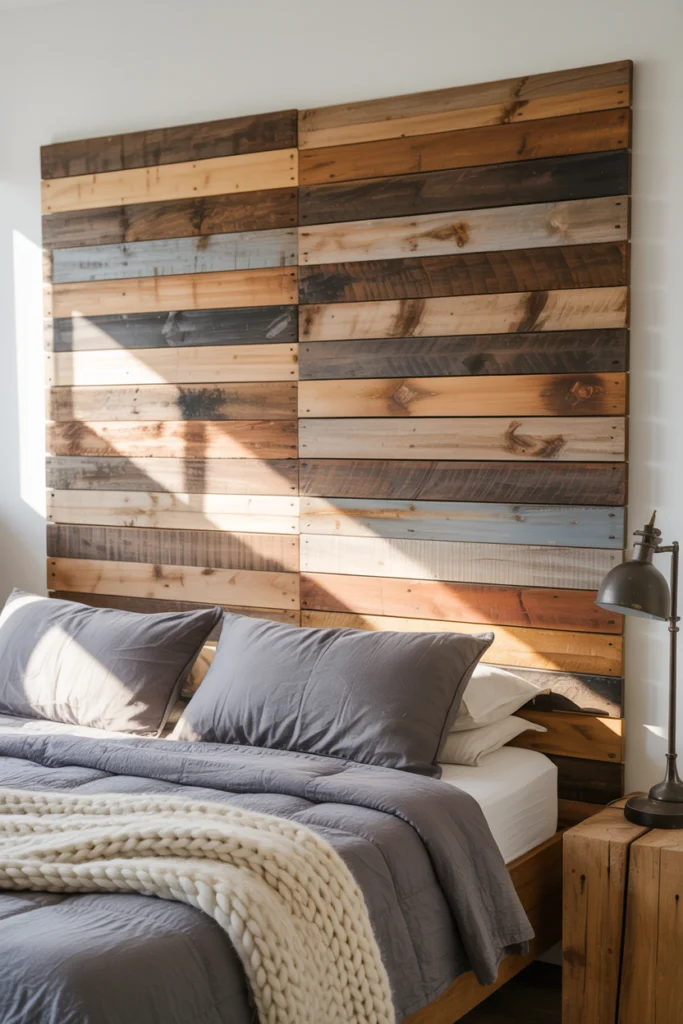
If you want to infuse warmth, architectural character, and authentic rustic texture into your space, a reclaimed wood plank headboard is unmatched. Essential materials include weathered pallet boards or reclaimed barnwood planks, three vertical 1x4 support furring strips, wood screws, medium-grit sandpaper, a drill, and a protective matte polycrylic sealer to lock in the patina without adding artificial shine.
Start by sanding the boards to eliminate rough splinters while preserving knots, nail holes, and saw marks. Lay your vertical support 1x4s on the floor, then align and screw the horizontal planks across them, staggering board lengths and color variations for organic visual interest. Secure the assembled panel directly into your bedroom wall studs.
**Skill Level:** Beginner | **Time Investment:** 3–4 hours | **Estimated Cost:** $25–$50 (or virtually free if sourcing recycled pallets). It instantly grounds modern and farmhouse bedrooms with natural, tactile warmth.
3. A Painted, Stenciled Headboard Design Directly on the Wall
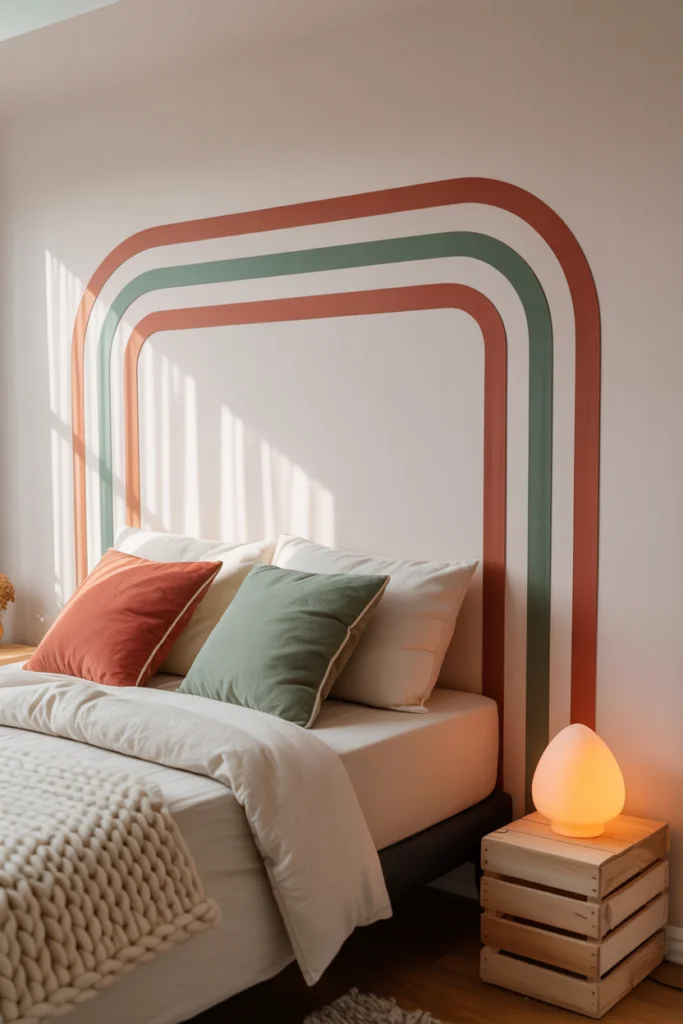
For renters, small space dwellers, or anyone on a shoestring budget, a painted faux headboard provides maximum visual impact with zero floor space consumed. You only need a quart of interior wall paint in a contrasting accent shade, high-grade painter's tape or a reusable geometric stencil, a pencil, string with a tack (for drawing perfect arches), a level, and a dense foam roller.
Measure your bed width and mark an outline 4 to 6 inches wider on each side. Map out a modern semicircular arch, sharp geometric color block, or repeating Moroccan stencil pattern directly onto the wall. Apply two thin coats of paint, allowing proper dry time before peeling the tape at a 45-degree angle for razor-sharp lines.
**Skill Level:** Absolute Beginner | **Time Investment:** 1–2 hours | **Estimated Cost:** $15–$30. It creates a stunning architectural focal point that is 100% reversible whenever you decide to redecorate.
4. A Fabric-Draped Headboard Using Curtain Rods and Panels
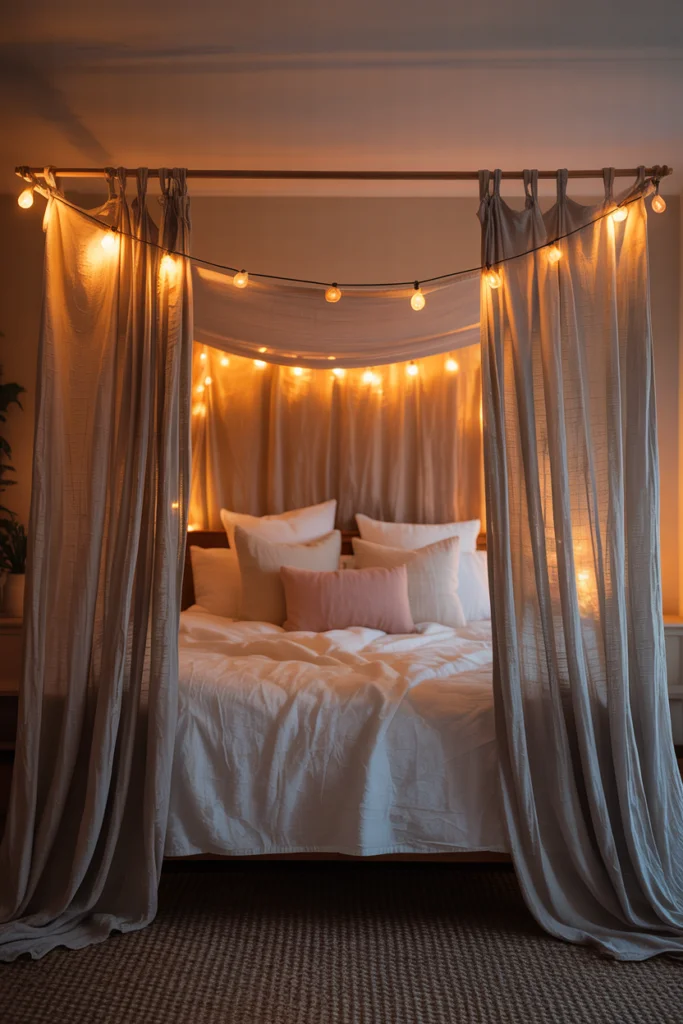
A fabric-draped headboard introduces soft movement, acoustic dampening, and romantic European boutique hotel vibes into your bedroom. Key materials include a sturdy wall-mounted curtain rod (matte black metal, warm brass, or natural wood), mounting brackets, hanging curtain rings or leather hanging straps, and two textured fabric panels (such as stonewashed Belgian linen, waffle weave cotton, or heavy canvas).
Mount the rod 36 to 48 inches above your mattress, ensuring brackets are anchored firmly into wall anchors or studs. Thread your fabric panels onto the rod, allowing them to hang cleanly behind your pillows or cascade softly onto the mattress deck. You can even insert slim foam cushions into custom pillow pockets for back support.
**Skill Level:** Beginner | **Time Investment:** 1 hour | **Estimated Cost:** $35–$60. This versatile design allows you to unhook and wash panels easily or swap textiles with the changing seasons.
5. A Woven Rattan or Cane Headboard Panel
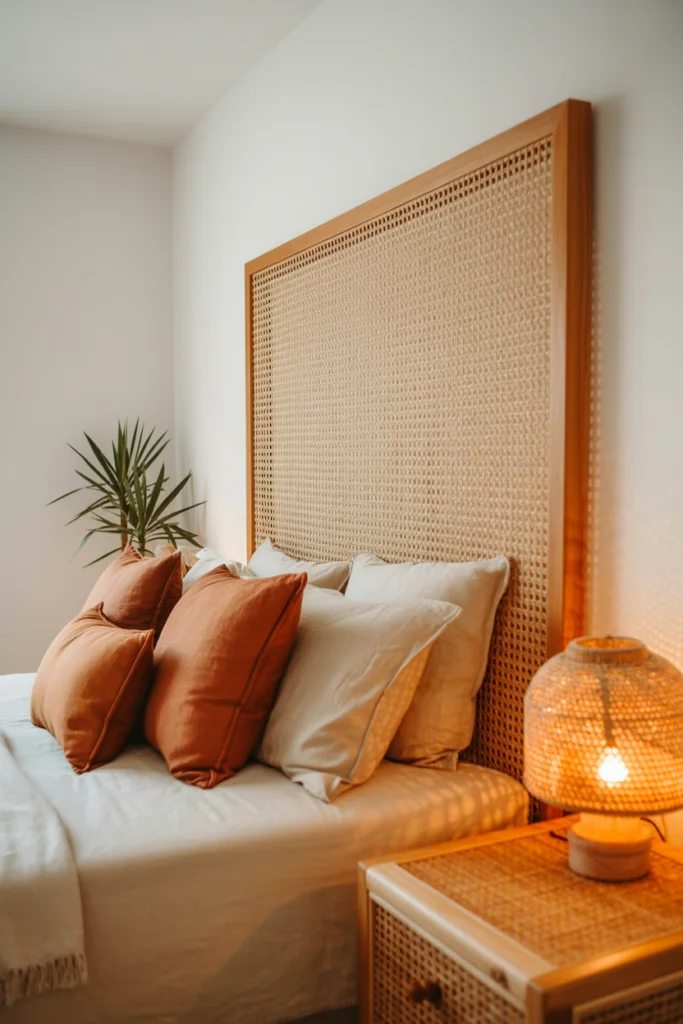
Cane webbing and natural rattan headboards are wildly popular in contemporary, Scandinavian, and coastal interiors, yet retail versions carry hefty designer price tags. To build your own, gather pre-woven open-mesh cane webbing roll, four 1x2 or 1x3 hardwood lumber boards (such as pine, oak, or birch), pocket hole screws, a staple gun, and warm water for soaking.
Submerge the cane webbing roll in warm water for 30 minutes to make the fibers pliable. Build a rectangular wooden frame using pocket hole joinery, clamp the soaked cane taut over the backside, and staple generously around the perimeter. As the cane dries, it tightens like a drumhead with zero sagging.
**Skill Level:** Intermediate | **Time Investment:** 3–4 hours | **Estimated Cost:** $50–$90. It infuses your bedroom with airy, organic texture, beautiful light filtering, and effortless bohemian warmth.
6. A Shiplap-Style Wood Headboard for Architectural Interest
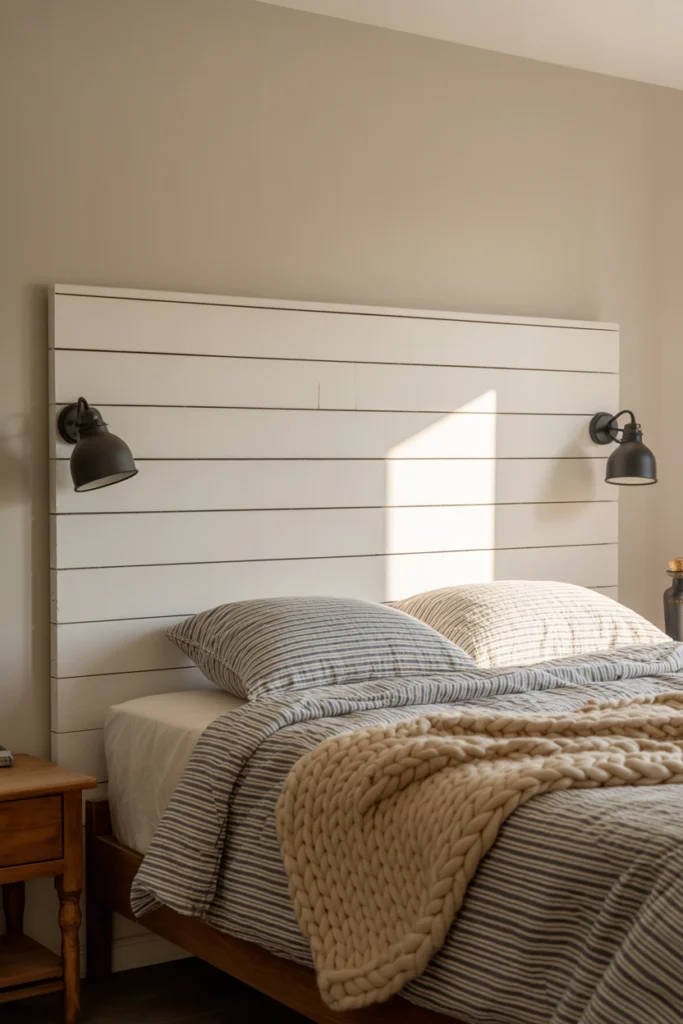
A DIY shiplap headboard adds clean architectural lines, depth, and crisp modern farmhouse elegance to an otherwise plain bedroom wall. Materials include pre-primed MDF or pine shiplap boards with nickel-gap grooves, 2x2 vertical framing studs, 1x4 pine boards for border trim, a decorative 1x3 top capping ledge, finishing nails, wood glue, and premium semi-gloss paint.
Assemble a lightweight rectangular backer frame, then install your shiplap boards horizontally from bottom to top, using spacers for consistent nickel gaps. Cap the top edge with a 1x3 wood ledge that doubles as a narrow display shelf for framed photos or small trailing plants. Fill nail holes, caulk seams, and apply a fresh coat of crisp white or dramatic charcoal paint.
**Skill Level:** Beginner to Intermediate | **Time Investment:** 3–5 hours | **Estimated Cost:** $40–$75. It delivers structured craftsmanship that makes the bed feel built into the architecture.
7. A Tufted Headboard Using a Button-Tufting DIY Technique
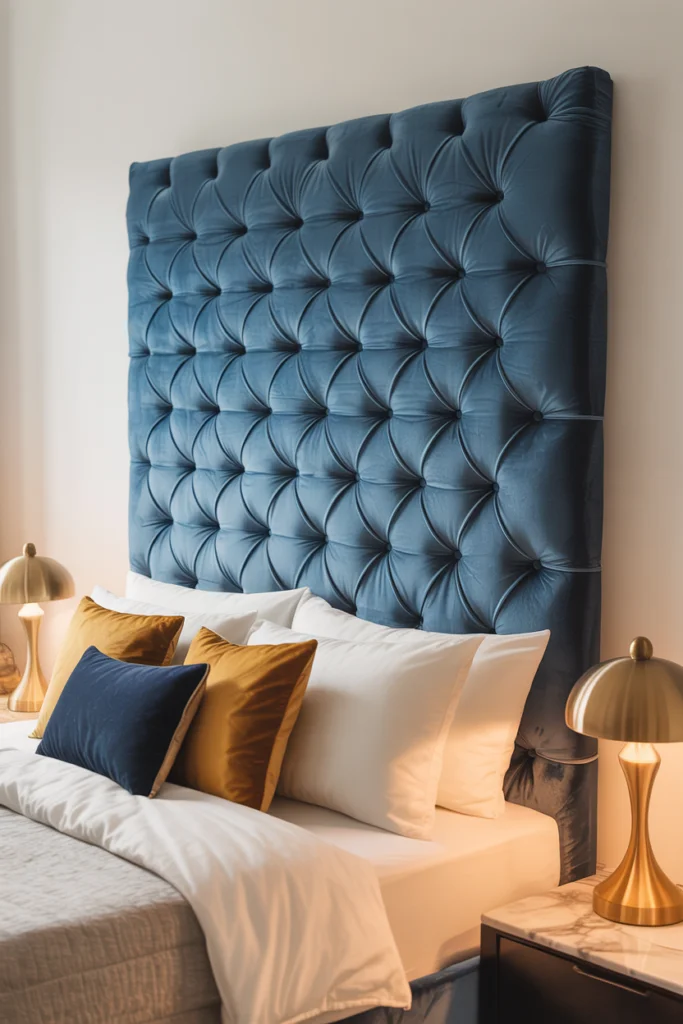
Diamond button tufting is the ultimate symbol of tailored luxury and timeless transitional elegance. Essential supplies include a 1/2-inch plywood sheet, 3-inch high-resiliency upholstery foam, batting, fabric-covered button kit, heavy-duty waxed upholstery thread, an extra-long tufting needle, drill, spray adhesive, and lush fabric like velvet or heavy linen.
Mark an evenly spaced diamond grid across the plywood and drill 5/16-inch holes at every intersection. Glue the foam to the board and cut matching holes through the foam. Drape batting and fabric over the front, thread your covered buttons from the backside through each hole with your long needle, pull tightly to create deep dimensional folds, and knot securely.
**Skill Level:** Intermediate | **Time Investment:** 4–6 hours | **Estimated Cost:** $60–$110. This impressive project transforms your bedroom into an upscale boutique suite at a fraction of custom upholstery prices.
8. A Wallpaper 'Faux Headboard' Shape Applied Directly to the Wall
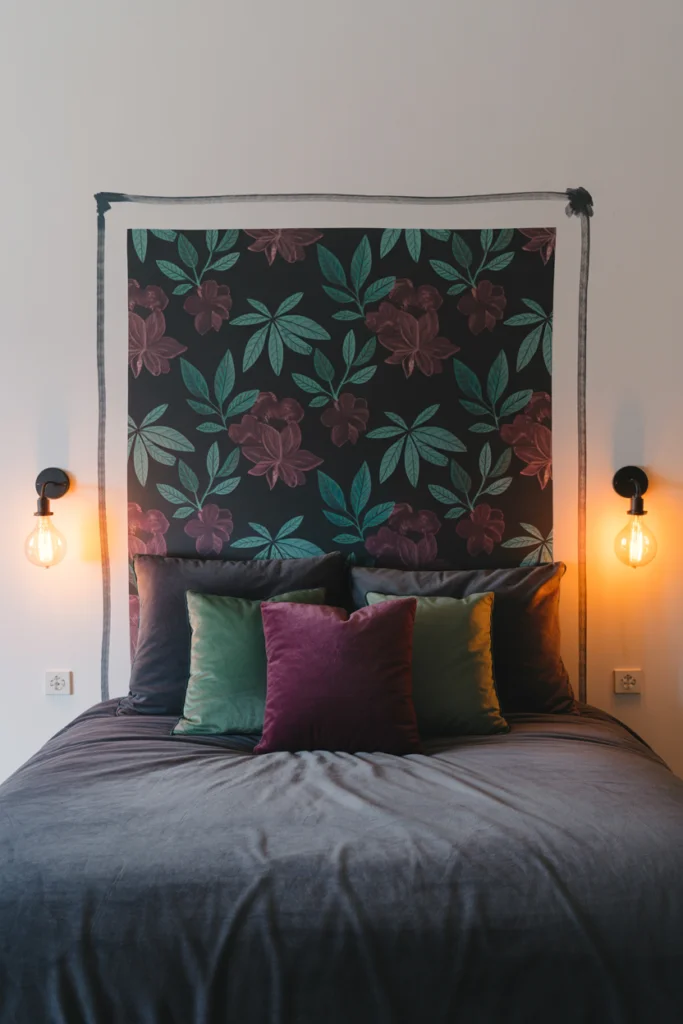
Peel-and-stick wallpaper allows you to introduce intricate designer patterns, lush botanical prints, or bold textures above your bed without any woodworking tools or permanent commitments. You will need one roll of removable wallpaper, a utility knife with fresh blades, a cutting mat, a long metal straightedge, a wallpaper smoothing tool, and optional peel-and-stick wood moulding trim.
Carefully measure and pencil your desired headboard shape—such as a classic arch, scallop, or clean rectangle—directly onto the wall. Apply wallpaper strips with slight pattern overlap, smoothing out air bubbles from center to edge. Use your metal straightedge and blade to trim cleanly along your penciled guidelines. Add a slim painted wooden border around the perimeter for a framed, three-dimensional look.
**Skill Level:** Absolute Beginner | **Time Investment:** 1–2 hours | **Estimated Cost:** $30–$55. It provides immediate pattern drama that can be peeled away cleanly in minutes.
9. A Macrame Woven Headboard for a Boho Touch
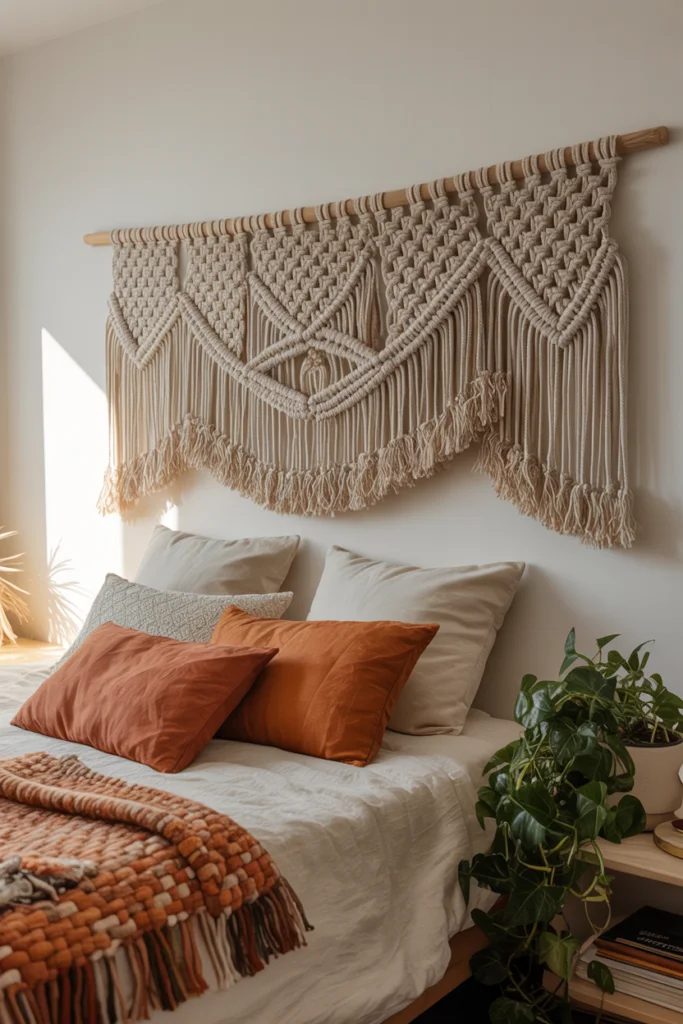
For lovers of free-spirited bohemian style, a handmade macrame headboard brings organic warmth, intricate hand-knotted textures, and calming movement into the bedroom. Materials include a sturdy wooden dowel or natural fallen birch branch (cut slightly wider than your bed frame), heavy-duty hanging hardware, and 4mm to 5mm natural braided cotton macrame cord.
Suspend the branch from two temporary hooks at working height. Knot lengths of cotton cord across the branch using basic lark's head knots, then weave alternating square knots, half-hitch patterns, and cascading chevron fringes. Leave long, flowing tassels at the bottom to rest softly behind your accent pillows.
**Skill Level:** Beginner to Intermediate | **Time Investment:** 4–8 hours (a wonderfully relaxing weekend craft) | **Estimated Cost:** $30–$50. This textile centerpiece creates an inviting, tactile sanctuary with unmistakable handmade charm.
10. A Geometric Wood-Panel Headboard Design
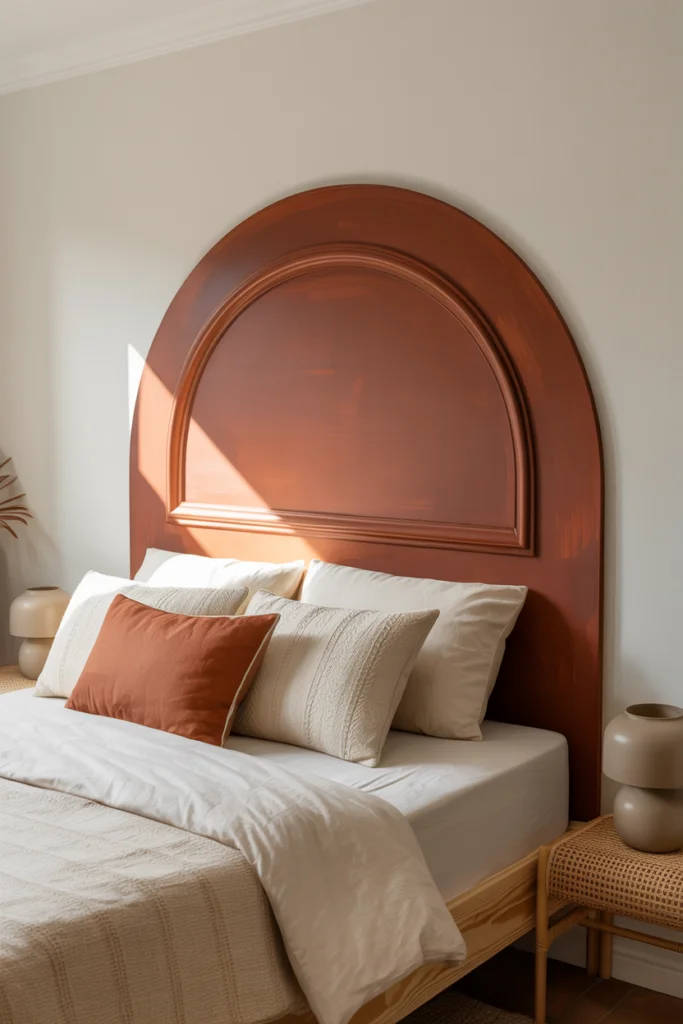
If you appreciate contemporary mid-century or modern Scandinavian design, a geometric wood-panel headboard delivers striking architectural flair. Required materials include a 1/4-inch plywood backer board, 1x2 pine or poplar wood lattice moulding strips, a miter saw or hand miter box, wood glue, brad nailer (or finishing hammer), wood stain, and clear protective topcoat.
Draw your geometric layout on paper first—popular choices include herringbone, chevron, diamond grid, or asymmetrical intersecting slats. Cut your lattice strips at 45-degree angles, dry-fit them onto the backer board to verify tight joints, then fasten each piece with wood glue and 5/8-inch brad nails. Stain the wood in rich walnut or warm oak to highlight the dimensional pattern.
**Skill Level:** Intermediate | **Time Investment:** 4–5 hours | **Estimated Cost:** $45–$85. The intersecting shadow lines create dramatic visual depth that elevates the entire room.
11. A Floating Wood Shelf Styled as a Minimalist Headboard
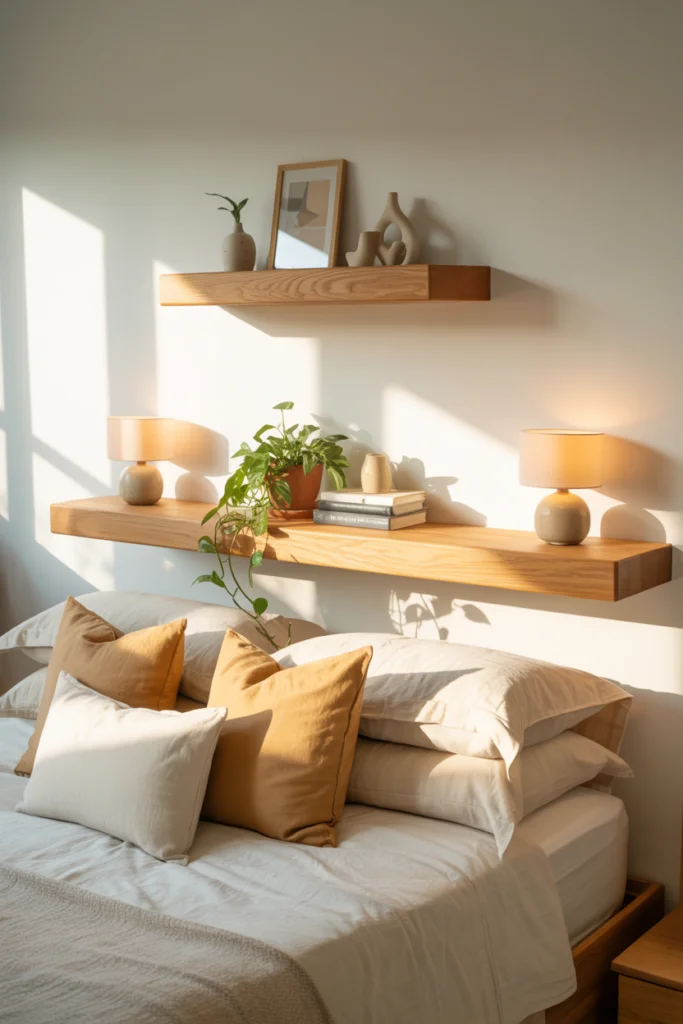
A deep floating wood shelf headboard combines streamlined minimalism with highly practical storage, making it ideal for compact bedrooms where bulky nightstands simply will not fit. Supplies include a solid 2-inch thick wood slab or hollow-core floating shelf box (measuring the full width of your bed frame), heavy-duty hidden steel shelf mounting brackets, masonry or stud screws, a level, and wood finish.
Anchor the heavy-duty bracket bar securely into at least three wall studs at shoulder height when sitting upright in bed. Slide the wooden shelf onto the mounting rods and lock it in place. Style the top ledge with framed art prints, a small bedside clock, reading glasses, and trailing plants, letting your bed tuck neatly underneath.
**Skill Level:** Beginner to Intermediate | **Time Investment:** 1–2 hours | **Estimated Cost:** $35–$65. It provides a clean, modern aesthetic with practical everyday utility.
12. A Painted Mural 'Faux Headboard' for a Bold, Artistic Statement
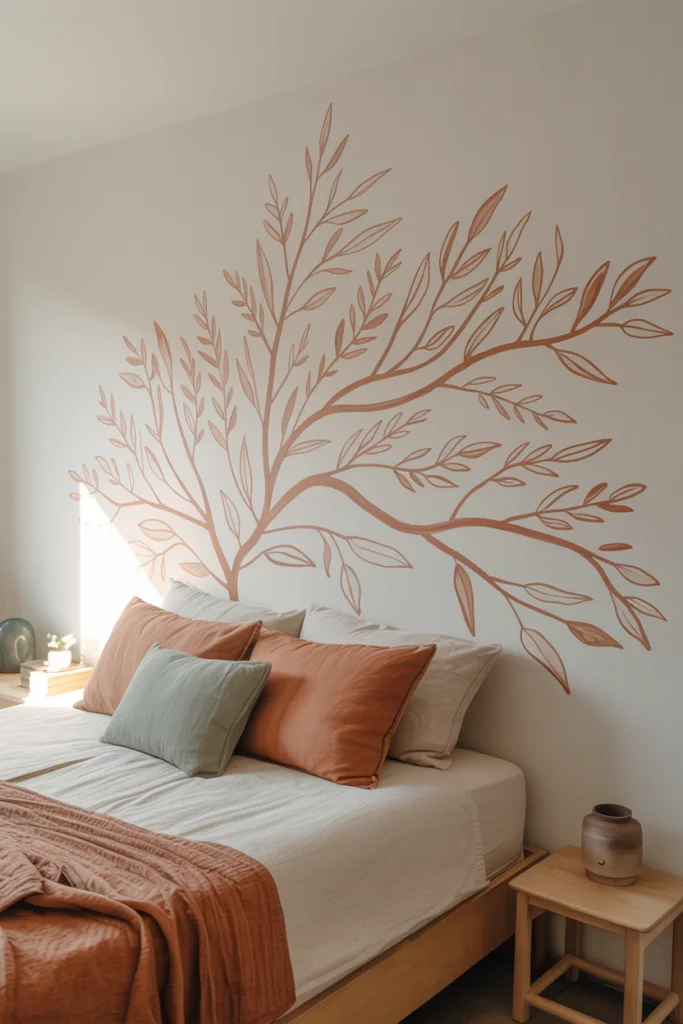
Unleash your inner artist by turning the wall behind your bed into a one-of-a-kind painted mural headboard. Gather two to four sample pots of acrylic interior wall paint in a cohesive palette (such as desert sunset tones: terracotta, dusty rose, warm mustard, and olive green), assorted artist brushes, painter's tape, a damp sponge for organic edges, and chalk for sketching.
Lightly sketch your mural concept onto the wall with chalk—options include overlapping organic arches, a glowing sunrise motif, botanical silhouettes, or modern abstract brushstrokes. Paint each shape with two smooth coats, blending tones or maintaining crisp graphic edges. Once dry, wipe away any residual chalk guides with a damp cloth.
**Skill Level:** Beginner | **Time Investment:** 2–3 hours | **Estimated Cost:** $20–$40. This zero-footprint headboard is pure creative expression that guarantees your bedroom looks like no one else's.
DIY Headboard Comparison: Skill, Cost & Best Style
| Headboard Idea | Skill Level | Est. Cost | Best Decor Style |
|---|---|---|---|
| Upholstered Plywood & Foam | Beginner–Intermediate | $45–$80 | Modern Luxury & Contemporary |
| Reclaimed Wood Planks | Beginner | $25–$50 | Rustic, Farmhouse & Cabin |
| Painted Stencil / Wall Arch | Absolute Beginner | $15–$30 | Rental Friendly & Minimalist |
| Woven Cane / Rattan Webbing | Intermediate | $50–$90 | Bohemian, Coastal & Japandi |
| Diamond Button Tufted | Intermediate | $60–$110 | Glam, Classic & Transitional |
| Floating Shelf Ledge | Beginner–Intermediate | $35–$65 | Scandinavian & Small Spaces |
Start Your Bedroom Transformation Today
Upgrading your bedroom with a DIY headboard proves that you do not need an extravagant budget or professional carpentry experience to create a stunning, designer-worthy sanctuary. From plush tufted velvet and rustic reclaimed timber to zero-footprint painted arches and breezy linen drapes, each of these projects offers an accessible way to personalize your space.
The key to a successful DIY is choosing a project that aligns with your current skill level, available tools, and budget. Pick your favorite design from this list, gather your supplies, and spend a rewarding weekend crafting a custom headboard you will love waking up to every single day!